Instancing Tutorial In 3ds Max By Aziz Khan
Hello friends, in this tutorial I will show you how to instance one single object to hundreds in the scene by having just one single object in the scene, if notice sometime some people has done their models and they want to attach it into motion path or wants to have allot of the same model in the scene without cloning and also need some nice respective motion without interpenetrating each other, for example if you watch the movie (INDEPENDENT DAY) in the end of movie if you notice from spaceship allot of other small ships are coming up and start moving, basically there is 2 spaceships in the scene the big one which produce the smaller one, and the second is the smaller one which is coming up from bigger spaceship these you see its called instancing, hope you understand something about instance.
Tutorial level intermediate to Advance.
Ok lets start and lets see what is instancing, Fire up 3ds max or if running already reset to have nice and neat scene.
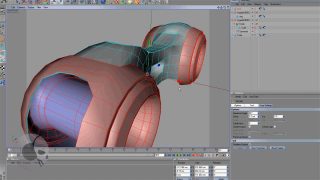
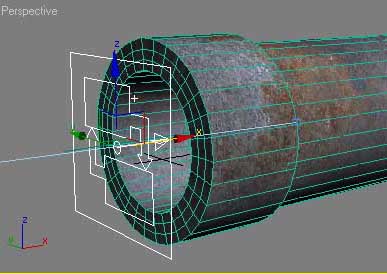
1-create tube and give it the shape pipe line because we are going to show how to Gas is moving inside the pipe line.
Do something like in the picture below.

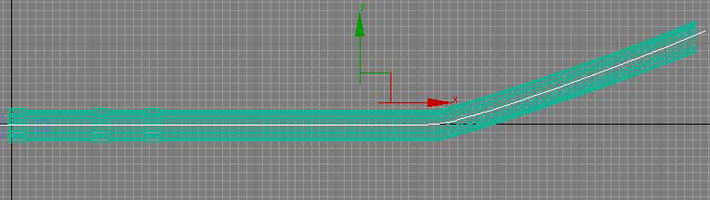
2-Now draw a line in the middle of tube to use it as motion path later, in image below.
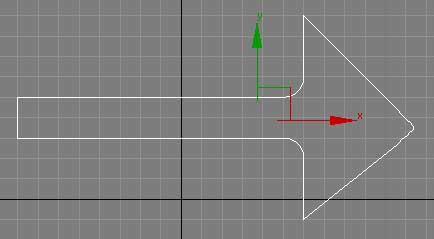
3-Now draw a line to present the arrow to show the gas movement inside the pipe line as in the picture below.
4-Ok then extrude it as in the picture below the thickness should be reusable to animate,
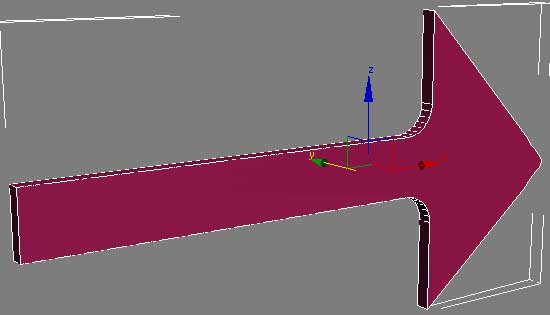
5-Keep the arrow in anywhere in the scene it dose not matter where it is, in picture indicating below.

6-Now we are pretty done with our necessary objects in the scene. and now its time to start instancing go to Particle System as like in image below.
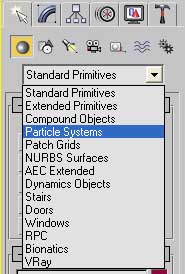
7-And from particle System Chose (PF Source) as in the image down.

8-Now create it in the starting hole of pipe line to have motion on it the (PF Source) should be circle its by default rectangular here is mine too rectangular in the image below its rectangular, then I have change it into circle shape to fix the hole,
9-With (PF Source) Still selected go to its modify panel and the chose (Particle View) as like in the picture below.

10-Now you should see these setting in the upper top of (Particle View) dialogue box because these all very important we will work with these setting to create our instancing objects. as in the image below.
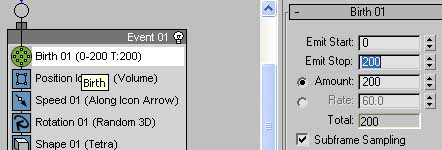
11-Now click on the (Birth 01(0-30 T:200) and increase the number of (Emit Stop) where you want to particle stop generating, like in the picture below.
12-Now click on Rotation 01 its by default (Random 3D) then change it to (Speed Space Follow) as in the picture below,

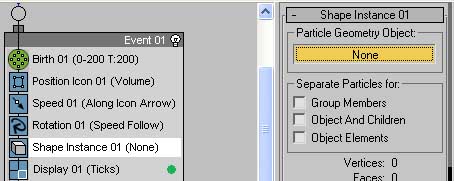
13-Ok right click on (Shape 01 (Tetra) and then do the same in image indicating below.
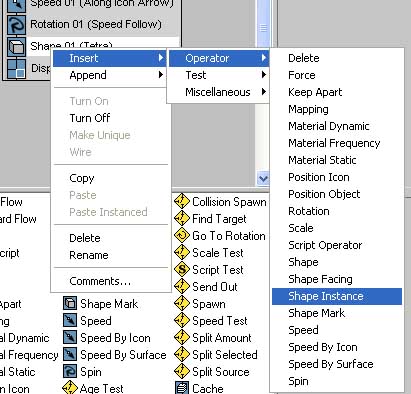
14-When you do this and now Pick the (None) button as like in the picture illustrating below.
15-And with (None) button still selected and then hit the arrow in the scene to instance particles with this arrow, as in the image below.
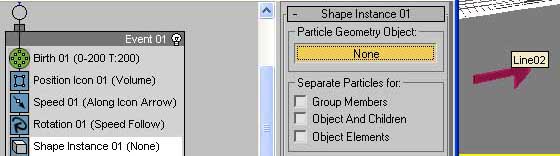
16-Now the (None) button changed to (Line02) and then decrees the (Scale % ) to something like 20 this is my setting you can give any value do you like. as picture below.

17-Ok Now click on (Display 01 (Ticks) and then change (Type) to (Geometry) as in the image down.

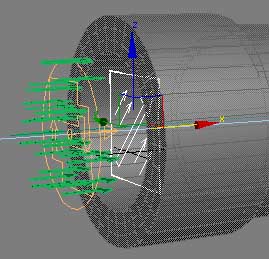
18-Now once for last time Right on (Speed 01 (along icon arrow) and then do the same as in the picture indicating down.

19-Now you will see a rectangular icon appears in the scene sometime its very small if yours do like this just scale and rotate it to fix where you want to put it. as in picture below.
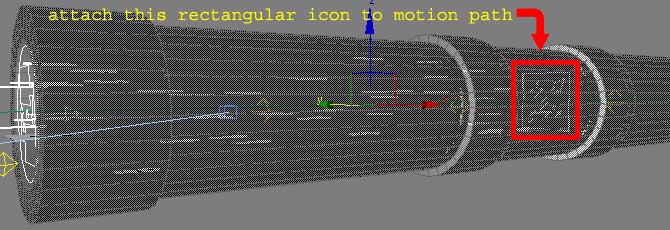
20-Attach this newly created rectangular icon to motion path with line which we have created in the starting of this tutorial, when the rectangular icon moves the arrows will follow it nicely without any interpenetrating, as the image below.
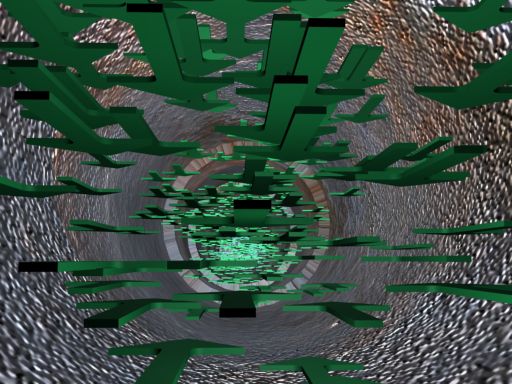
Here is the final result render of mine this just to indication that how gas is moving inside pipe line, by doing this you can show blood cells how they behave inside the vein, and also by this method you can do endless creation you can never imagine.
The final render is below.
Hope this will help you to create something cool with your own pace, this tool is very powerful tool try something to be powerful and let me see how you talented.
Thanks your well-wisher Aziz Khan
If you have any comments, suggestions, feedbacks, and questions are welcome Please fell free to write me.


About The Author
You might be interested in