Rigid Body
Hello friends
In this tutorial I will show you how to work with (Active rigid bodies) and (Passive rigid bodies) to collide object in the scene.
Dynamics has really nice effect to create real visual effects its commonly use in the movies and the industrial projects.
ok lets turn to start, open Maya or if you running already create new scene to work better.
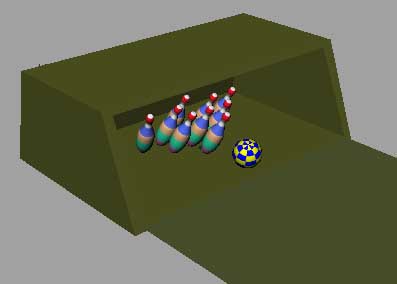
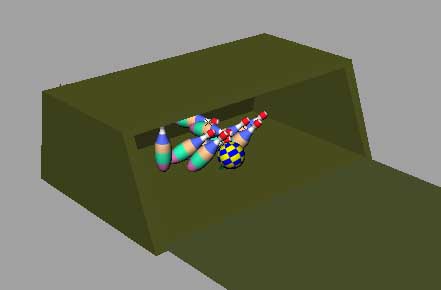
1-Create a scene such like in the picture or if you want to use my provided scene ( Click Here To Download ).
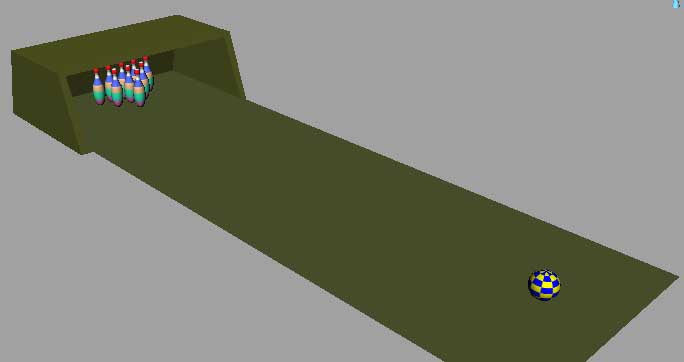
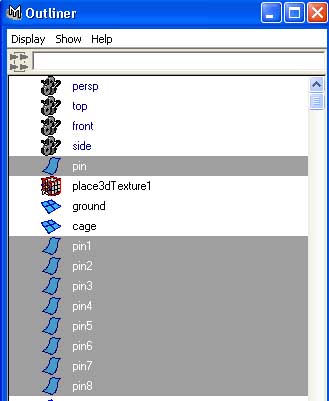
2-Now here we want to add active rigid body and passive rigid bodies to our objects, here I want to describe what object will be (Active Rigid Body) and what will be (Passive Rigid Body) since the plan and the cage is not moving its in their places are not able to move, plane and the cage will be the (Passive Rigid Body) and the others Ball and the pins are active here I mean from active they can collide with each other when the ball hits the pins that is why they will be (Active Rigid Body), ok to do this first go (Window>Outliner, from the outliner chose all the pins and the Ball as like in the picture below.

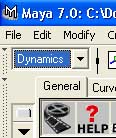
3-Make sure you are in (Dynamics) Mode as in like image down.
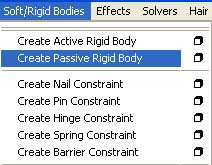
4-Still with the Pins and ball selected go to (Soft/Rigid Bodies) then click now our pins and ball are Included in (Create Active Rigid Body), as in image below.
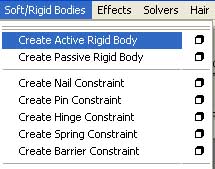
5-Now select the plane and the cage, first select plane and the hold down shift key then click on the cage to comprise in selection, now go again to (Soft/Rigid Bodies) dropdown menu the click on (Create Passive Rigid Body) as in the image below.
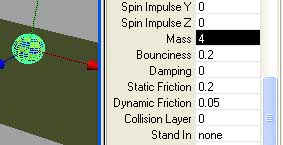
6-select the ball now and then see in the right hand of user interface you will see called (Channel Box), there you see called rigid body1 or it depends on that how many objects in the scene and then click in (rigid body1,2,3,5,7,9) any name it can have no problem just click on that write (rigid body) in the channel box to expand its parameters, and then change these settings on yours as in the picture below.

7-also scroll little bit down in the rigid body parameters and then do these settings, as like image below.
8-Now hit the play button if you see ball it is moving in the -50 in the X axis, that is why we gave -50 in initial Velocity in X axis, now one problem we have got here when ball is colliding the Pins they are all pulling up and flying up to Y axis, why this like that ok no problem this is not so big deal, because pins and ball are not has the (Gravity) field, so lets add (Gravity) field, to do this first of all select pins and the ball and then go to (Fields>Gravity as like in the image below.

9-One another problem we got here what is that ? if you see the pins are falling down before hitting the ball to pins, as like in the image below.
10-Now to fix this problem we will do some changes in the (gravity) field in the channel box, before doing this select first all the pins in the outliner as in the picture below.
11-Now in (rigid body) channel box you will see the (Center of Mass) is not set to 0 as in the picture below,
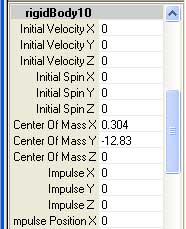
13-Now if you play the animation the pins are not falling down because we put the value of zero in the (Center Of Mass) as like in the picture below.
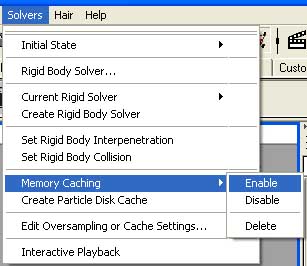
14-when our ball and pins are colliding nicely with each other and you are satisfy that this animation is ok to see more real action in the scene, go to (Solvers>Memory Caching>Enable, as like in the picture below.
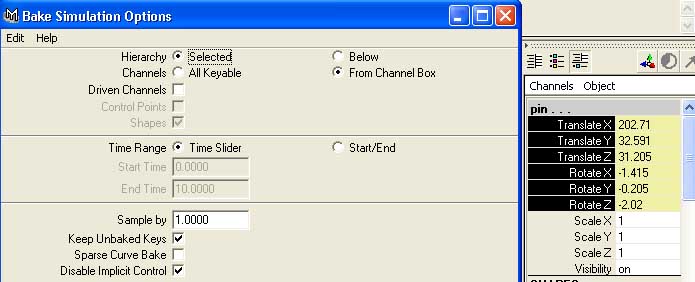
15-by enabling memory cache we will be enable to see our animation as real as in the movie clip. now how to do that? First of all select Pins And the Ball, ok go to (Edit>Keys>Bake Simulation click on the small rectangular box, as in the image illustrated below.

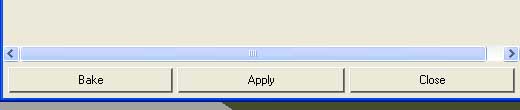
16-You should see now (Bake Simulation Options) in the channel box select (Translate) and the (Rotate) boxes by holding left mouse button and drag down to select, and then do this settings in image below.
17-and then hit the (Bake) Button, wait for a while until bake simulation is not done.
18-When you done play the animation now you see Ball is colliding pins very freely there is not interpenetration.
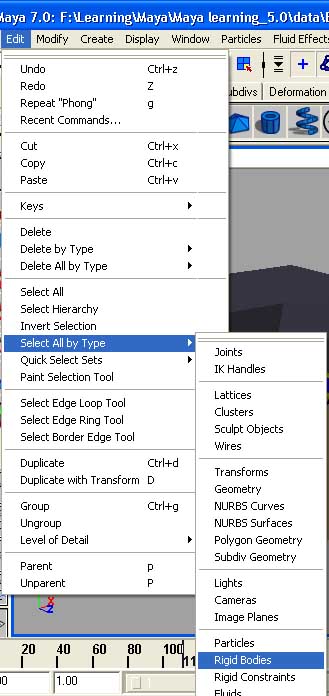
19-to see key frames go to (Edit>Select all by type>Rigid Bodies, as like in the image below.
20-Select now any pins in the scene you will see all the key frames for the selected pin, as in picture below.

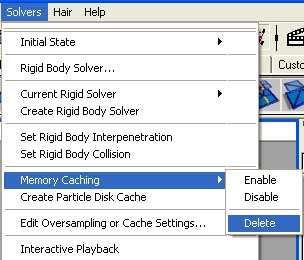
21-when you satisfy with your animation and you want to render it as avi, go again to (Solvers) to clear memory from load and the hit just (delete) it, now your memory in clean, as like in the picture below.
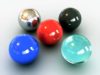
We are pretty done with our animation here is the final result of mine in the picture below.

If you have any comments, feedbacks, questions, suggestions please feel free to write me.

About The Author
You might be interested in